Bonsaikapilaas : # awesome. # do it
='data:blog.title' itemprop='name'/>

pinterest

Showing posts with label # awesome. # do it. Show all posts

Apr 3, 2021

How to Graft a Branch On Bonsai tree

 Grafting

Its a magic word. Many of us garden lovers feel like doing grafting on our plants and creating a different varieties. Usually many gardeners do grafting to enhance the plant by creating a new look to the plant and to produce new varieties of plants,. Another importance of grafting is to make the plant to produce more and quality fruits at a early stage. Some times grafting method gives new life to that plant by repairing a damaged area or side of the plant with a graft.

There are different methods of Grafting is there. Each method is having a specific name depending on the type of grafting. Grafting is also horticulture science perfect cut and union plants gives success. 

When we are doing Grafting we have to remember there are two parts one is root stock and second is scion. Root stock is the plant which is undergoing graft and scion may be a branch of the same plant or another plant which is going to have union with root stock.


Root stock and scion plays a main role in grafting. 
There is a lots of difference between air layering and grafting, In air layering from one plant we are getting two plants. but in Grafting two plants are merging together to become one plant.
In this chapter we are going to learn about Inarching grafting and learning step by step of connecting a  branch on root stock of the same plant. usually this procedure is followed by most of the Bonsai
 enthusiast. This method helps the plant to have a branch where it is needed.


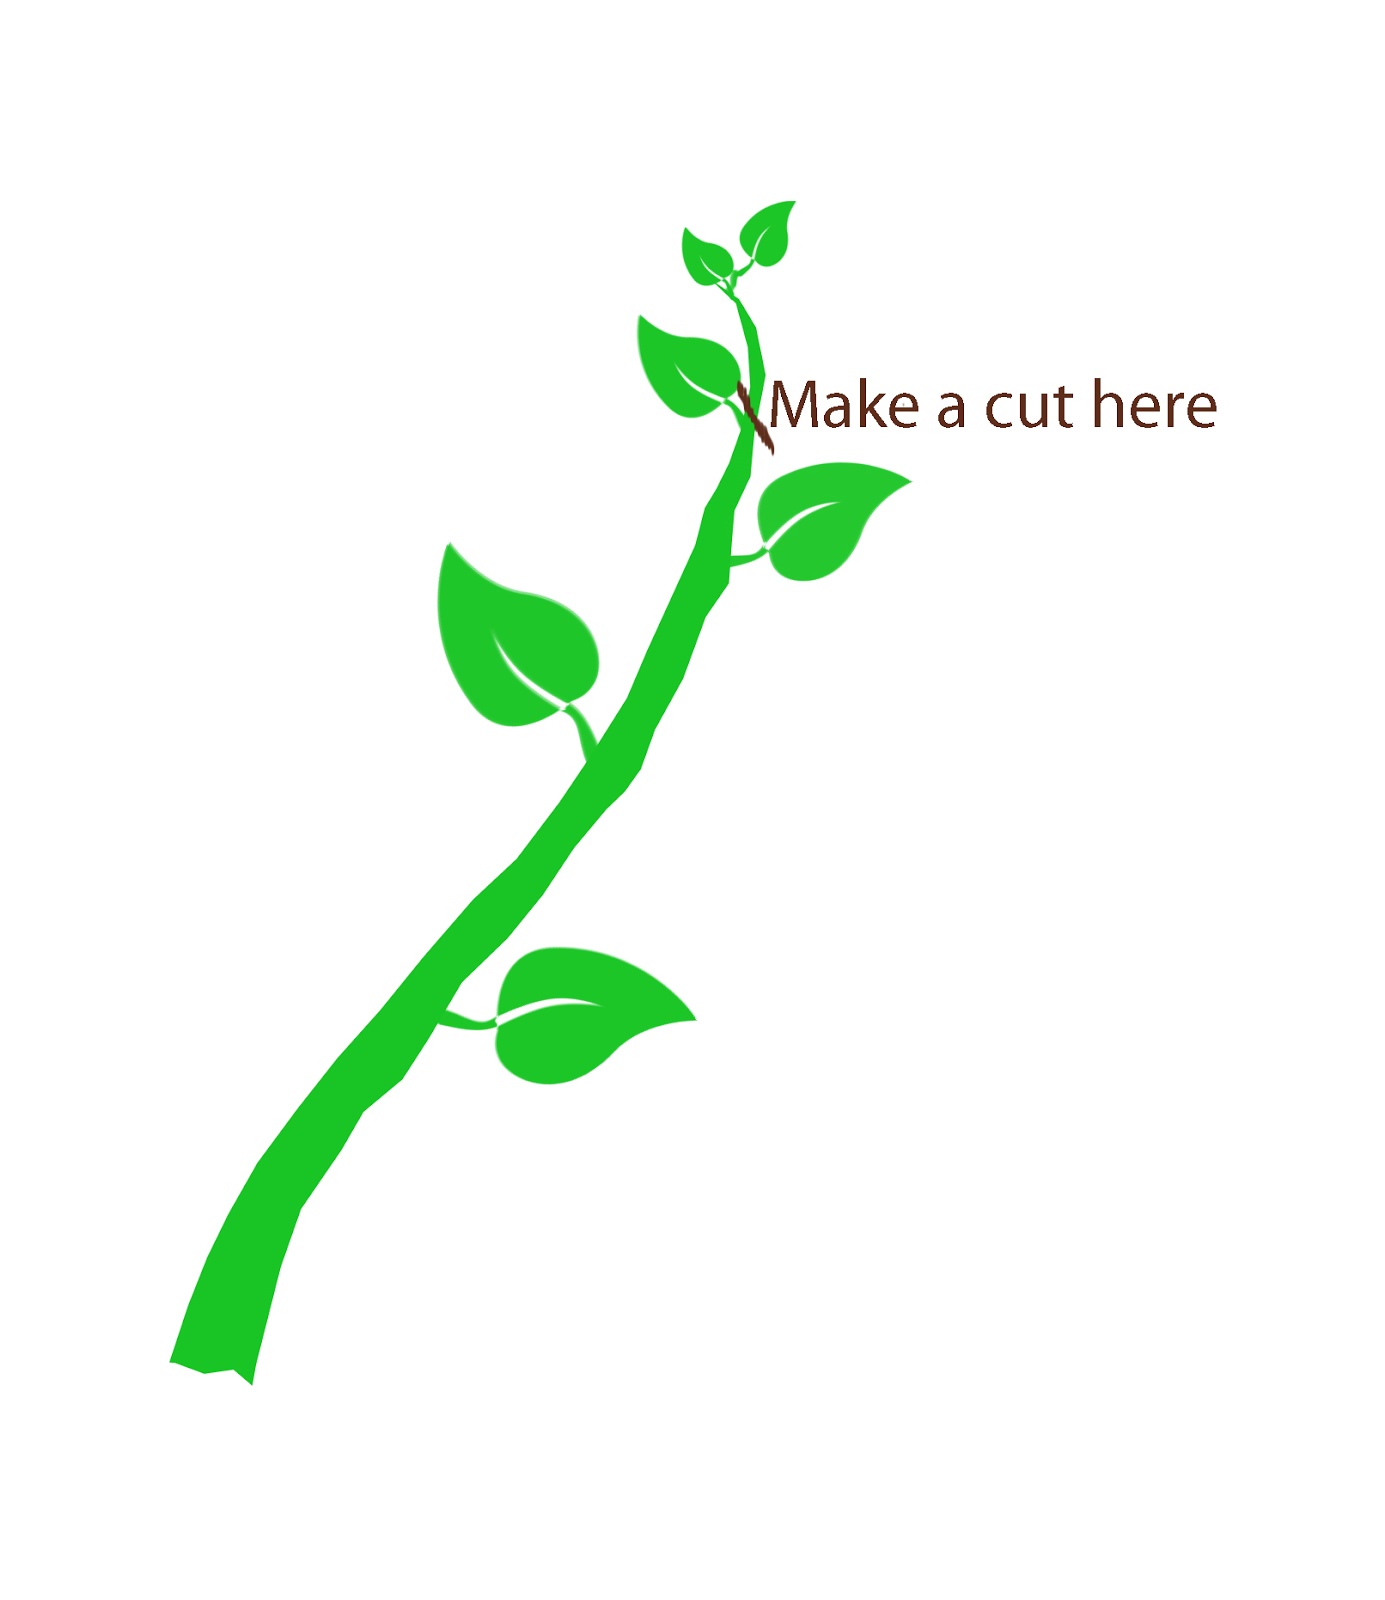
Usually Bonsai artists use this method , where the trunk line is long and not having any branches and needs a branch. First select the place where we want to graft the branch. mark that place.
With a sharp knife remove the bark where it marked  on trunk and the branch. and join them with a tape as shown in the video.
And bring both together and join them with a tape.


The region where graft is done should place to gather with out any air gaps and seal two branch and trunk line together with insulation or graft tape. 

Seal the graft with glue gun or wax or m seal , so that wont allow water or air enter in to the graft.

Keep this plant in a shade to protect from direct sunlight. Merging or uniting branch to the trunk takes one season, wait till that time. 


Then remove the  tape gently without hurting the grafted area. Now cut the branch below where grating has  done and separate it.

Now our plant is having a new branch on the trunk line. this is the beauty of Grafting , it changes the look of the entire plant.
Entire video of grafting is available on link below

After Six months new branch is added to the trunk line

This is top branch is merged with main trunk .

Second branch is also a joined with main trunk line

This type of grafting helps to create new branches on trunk line wherever they needed.


May 11, 2020

How to make a Shohin Bonsai of Buxus

Shohin Bonsai are the small Bonsais of small in size means , Height of these Bonsais are below 8 inches. Usually Miniature Bonsais are classified in to three sections depending on their heights.
Shohin Bonsai is of below 8 inches
Mame Bonsai is of below  6 inches
Shito Bonsai is of below  3 inches
Keishi Bonsai is of below  1 inch
Developing styling a miniature Bonsai is a difficult job of creating a style. Plant will having less no of branches and the size of the plant is also small. selection of a will be a ramification is very selective job.
Here in this post Buxus microphylla is selected and made into shohin bin of below 8 inches. Now we will go  in to detail transformation of nursery plant in to shohin  Bonsai is explained . Then after studying this we will go to other small Bonsais. 
Buxus plant was bought from a nursery long back may be 8 to 9 years back. I will share photo of the plant that time.
In nature we will see many different styles of Plants . One of it is Multitrunked plants. Multi trunk Trees are having the habit of developing more sprouts from the base of the tree, but only some will survive and become multi trunk style.


First photo is the plant bought from nursery. it was kept like that for two years. then started working on the plant. By studying the plant I thought of this plant has a good potential to be a multi trunk or Raft style and to become a shohin Bonsai. then work was started on keeping the future style of the Bonsai by removing  the branches which were not fitting in to Bonsai design. I stared working in spring . 
Second photo i exposed the main trunk line by eliminating branches and keeping some selected one and did ramification by clip and grow method . then I kept the plant at a sunny place and did regular fertilizing. My Buxus Shohin Bonsai became strong and ready for next ramification.
Then slowly Plant is started getting new leaves.


Below is videolink to see how plant is transformed to shohin Bonsai

The above link will clearly will show you how the Boxwood plant made in to a  Shohin Bonsai..i will share recent photo of the plant

Mar 16, 2020

Kokedama / Koke Bonsai Making Easy


Kokedama is a Bonsai holding a plant with moss ball, It is a variation of Bonsai in Japan. Its becoming very popular because of its beauty and low maintenance. Now Bonsai lovers are in love with Kokedama of Japan. its a old traditional art goes along with Ikebana, and Bonsai.
Kokedama is becoming hot gardening topic here I will show how to make kokedama moss ball..

Kokedama originated 30 years back a japanese word ne- rai, means root wash , which means no pot,  This art is also calles as koke - Bonsai. It is changes it style by wrapping with moss and became kokedama means moss Ball. Actually its a one of its kinds of Bonsai.
We can say kokedama as a Eco friendly way of growing plants, because here we are not using any pots.
Kokedama  can be made with out door, indoor, succulents, fruiting and flowering plants.its a beautiful  art for long lasting relationship with the plant and man. In kokedama one  can use  mixed display of plants  or single one according to your taste. The beauty of this Art is  diversified plants ranging from tropical to temperate , succulents to orchids can be selected according to your taste, weather and place.
Materials needed
Plants needed ,
Fern, Pine, PhilodendronSyngonium , Sansevieria , Maple, anthurium, dracaena, Fishbone Cactus, Asparagus, Fish Tail Fern, schefflera plant ,orchids, Anthurium, Caladium, African violet, succulents, Bromelaids, jade, Bamboo.etc...
Bonsai soil + Peat Moss
Keep Bonsai soil and  peat moss ready.
Sphagnum Moss
Sphagnum Moss is needed. keep Moss in water for ten minutes.
scissors 
Jute or Hemp , twine 
For tying the Moss ball. 


!) Keep Bonsai soil  with 15 % of peat moss and keep it ready ,Depending on the plant species we can change adding percentage of the peat moss.
2) Take out  plant from the pot and make Bonsai soil and peat moss little wet and press the soil around the root ball tightly , form a ball like structure around the root by pressing the soil tightly with both palms..


3) Now take wet moss and squeeze out water, put the moss around the soil ball and cover the soil completely with Moss and press out water a little, it will be  comfortable to tie the thread around the moss ball.


4) Take hemp and start tying around the moss ball a little tightly in a manner of 11 to 5 numbers in a clock., There are different styles of wrapping some times with two colored thread or single thread, what is comfortable for you, you can do it in that manner. If you are tying in a angular way in one direction that gives beautiful look to the moss ball. 


5) This kokedama can be made it as a hanging plant or you can keep it on a small stand also.


6) Watering depends on species of the plant that made it in to a Kokedama, and also on the season and also the zone where the plant is growing. If your plant is a succulent dip the moss ball in water for 15 to  20 minutes once in a week. It is advised to keep the plant away from scorching sun light.
8) Re potting once in two to three years depending on the root growth. Fertilizers to be used in the liquid form,


Learn More on Visiting Below link You tube Video

Kokedama Making Easy


Mar 11, 2020

Terrariums

 Closed terrariums act as an Earth surface where everything is provided by the nature. The light energy provided by the sun helps the plants in food preparation and release of oxygen and water vapor. The water vapor goes up and stays on wall of the jar. Night time plants take oxygen and release carbon dioxide during respiration process. The water vapor slowly condenses and helps the plants watered.in closed terrarium It is a cycle and it continues and helps the plants to grow just like the plants on the Earth.  some people called it as a greenhouse effect. It also a good example for children to show how our plants are growing in nature. 


Feb 11, 2019

Taking care of Bonsai Plants During Spring Season

Taking care of Bonsai Plants During Spring Season

In Winter  that is December and January the plants growth is slow. Tropical plants still have little growth when compared to temperate countries where growth is totally stopped and plants will go into dormant stage. Now winter is going to end and spring is starting.It is the best  season for growth of the plants. They give many fresh leaves, new branches.

This is the season for cutting, shaping, pinching and re potting of plants. Plants need more fertilizer during this season.
In juniper and in pine plants the pinching of leaves allows rapid growth in during this season.
Cutting pruning and wiring of Ficus plants in  can be done during these months, this allows the plant to create a new style and rapid growth.
Cutting and shaping a Bonsai Plant :
The straight growing plant can be given a cut to reduce the height of the plant. The new top growing buds can be removed, when growth is stopped at the top the plant the buds at the bottoms becomes active. During this many new branches from the bottom of the plant develop at the base of the node. Allow that branch to grow and have six to seven leaves. This will be the primary branch of the plant. Then remove the top new buds on primary branch,Then the Primary branch starts giving secondary branches, allow them to grow. Start shaping the plant with wire and create your own style.
When Secondary Branches will have six to seven leaves, cut the top new bud of secondary branch. by doing this the plant will have more branches, it will attain a shape of a mini tree. Here I am giving some diagrams to give a clear idea of cutting branches and development of a plant. 


 In this small video clip peepal tree shaping was shown. Here Peepal tree is growing straight and tall. It is also already developing  a new branch at the base, so to allow the base primary branch a cut has made with concave cutters in the middle portion of the branch, before cutting choose the height of the plant and make a cut. and allowing the base branch to grow stronger and wishing more branches at the base, so the plant will become bushy with more leaves.


This movie is about cutting and shaping of bonsai plant and allowing the down 
branches to grow.


Jul 15, 2016

Craft Class of making a Magnetic Photo Frame


Cut Card board in to 3/5 inches rectangular pieces. we need 2 rectangular pieces , one same size magnet to stick on to photo frame back side, one same size transparent plastic sheet.


photoframe

Cutting out the middle piece


                             The cut piece is just like a window as shown in below picture.


This is first rectangular piece


Two rectangular pieces covered with colour sheet.


Make flowers with flour . flowers can be made with all purpose flour or corn flour .  Take white glue and mix with water and add colour of your choice .  To this colour glue water Mix corn flour by slowly adding spoon by spoon , make a dough . and seal it in zip-lock bag and keep it a side for one hour ,it becomes smoother. This dough can keep it freeze and can be  used when ever you want.  Flowers and leaves can be made with this dough.  


Making a leaf


Making flowers


Roses made with flour


photoframemaking

 This picture shows putting gum and sticking transparent plastic sheet on it , so the photo can be seen clearly.                                                 
 Now stick  both card boards against each other.
 

Transparent plastic sheet is attached to the first frame so the photo can be seen clearly.


magnetic photo frame


magnetic photo Frame

facebook link page ;